Tuesday, September 27, 2011

Caesar Chicken with Orzo

The Date: 22 September 2011

The Occasion: Just a Thursday night dinner.

The Recipe: From this book, which I got at Ollie's years ago and have loved ever since. It's full of wonderful and very easy recipes that are easily fancied up and tailored to the ingredients you have and the flavors you like. I'd made this one before and knew I liked it.

How it Went:
This recipe is extremely straightforward. The only thing I really modified was the vegetables. Instead of a bag of frozen veggies, I used some freshly chopped onions, broccoli, and carrots. I also added the Caesar dressing much earlier in the recipe than it suggests. I find the flavors blend better that way. My version, below, is a yummy stir-fry type dish.

Your Turn:
Heat a little olive oil in a skillet, then cook chicken (2-4 breasts, depending on how many you're feeding) in cubes with a bit of chicken seasoning or Perfect Pinch. Add about three tablespoons of Caesar dressing (NOT the creamy kind) and some diced onions (half an onion).
Remove the chicken from the skillet when it's cooked, but leave the juices and dressing in the pan.
Add to the skillet
  • one can (about 15 oz) of chicken broth
  • 1 C of water
heat to boiling, then add
  • 1 C of orzo pasta 
and boil until pasta is tender, about 10 minutes, stirring occasionally.
Now, stir in your vegetables. About 2-5 cups of veggies, depending on how many you're planning to feed. Chopped fresh vegetables are best; a combination of carrots, broccoli, green beans, and onions is good. Shake some black pepper and a few more tablespoons of Caesar dressing in too.
Now let it simmer on medium heat for about 5-10 minutes until the veggies are crisp-tender. Add the chicken back in and let the whole thing simmer together for a few minutes while you set the table.
Serve with garlic bread or hot rolls, or with some fruit.

Thursday, September 22, 2011

Chicken Pot Pie

The Date: 19 September 2011

The Occasion: Monday night dinner. I had a hankering to make some comfort food, something that would come out of the oven billowing with thick steam, hearty and rich. Also, I had some cooked chicken left from when Mom came over last weekend to help me make chicken noodle soup to assuage my flu.

The Recipe: From Taste of Home, Annual Recipes 2011. I modified it a bit, and I think next time I would customize it even more. 

How it Went:
My first modification was to swap the can of cream of mushroom soup for a second can of cream of chicken soup. I don't do mushrooms. Cream of celery would have worked too, or cream of potato (do they make that?). Either way, first ingredient is two cans of cream of something soup. Here is where I would make another modification next time. I know canned "cream of" soups make dinner prep faster and easier, but they seem like cheating to me. And also, they're loaded with sodium and probably a lot of things I can't pronounce which is never a good sign. So next time I would like to try substituting a homemade version of cream of chicken soup. This looks like a good one to try.
The soups are mixed with some milk and spices.
Then the chicken and veggies are added. Enter, my next modification. Instead of two packages of frozen mixed vegetables, I used my own fresh veggies. I've never liked how frozen veggies come out. I was supposed to use a total of 32 ounces of frozen veggies, so I estimated that a handful of baby carrots, a few stalks of celery, four smallish red potatoes, and half a pound of fresh green beans would be about right. I peeled the potatoes, snapped the ends off the beans, then chopped it all up and boiled it in a few inches of water for about 15 minutes or so. In the meantime, I chopped up my cooked chicken.
I think it's a bit misleading when a recipe calls for "cooked chicken" or "cooked rice" or anything somewhat already prepared. If you're working with raw ingredients, cooking the ingredient before beginning the actual recipe can add sometimes a half hour or more to your total prep time! I loved making this recipe with the chicken already cooked. And I recommend, if it's ever possible, preparing all your ingredients beforehand - maybe in the morning or even the night before - to make meal prep faster.
When the veggies were ready, I stirred them, and the chicken, into the soup mixture.
For the biscuit topping, I have nothing better to suggest than good, old-fashioned Bisquick and milk. Mix it as the recipe directs, then plop it in 12 equal splotches on top of the pie. I thought the biscuits might sort of rise and become one solid topping, so I wasn't too precise on my 12 splotches, but it did not end up rising enough to form a continuous crust, so it would have been better divided into distinct servings with equally spaced biscuits on top.
The meal came out really yummy and served us for two dinners and a lunch for Pete. Lots of food.

Your Turn:
Preheat oven to 350.
In a large bowl combine
  • 2 cans condensed "cream of" soup (1 chicken, the other chicken, mushroom, celery, or your choice)
  • 1/2 C milk
  • 1/2 tsp dried thyme
  • 1/4 tsp pepper
  • 1/8 tsp poultry seasoning
Add
  • your vegetables (either a collection of fresh-then-boiled ones, or two bags of frozen mixed veggies) 
  • about 1 + 1/2 C cubed/shredded (depending on your texture preference) cooked chicken
Transfer the whole mess to a 9x13 dish, coated with cooking spray.
In a small bowl, combine
  • 1 + 1/2 C Bisquick
  • 2/3 C milk
Distribute in 12 equal splotches across the top of the pot pie.
Bake at 350 for 40-50 minutes, until filling is bubbly and biscuits are golden brown.

Tuesday, September 20, 2011

Ginger Snaps

The Date: 20 September 2011

The Occasion: Mom's Birthday. Her actual birthday is tomorrow, but since I won't be able to see her tomorrow, I am making a double batch of these cookies she loves to take to her at her Small Group tonight. A little birthday surprise. Later, for Pete and me, dinner tonight will be chili - a pound of ground turkey cooked on the stove with peppers and onions, then stirred with a can of diced tomatoes, a can of black beans, a can of kidney beans, and a packet of chili seasoning. Not worth blogging about. So this isn't dinner, exactly, but it's what I'm making when I'd normally be making dinner.

The Recipe: Can't remember where I got this one. Probably online somewhere, but now it's scribbled in sharpie on a recipe card in the fattest section of my recipe box: Desserts.

How it went:
Since I'd made these before, I wasn't too concerned about it working out. I knew that the dough would be kind of greasy and plop neatly on the cookie sheets in little shimmery piles. I knew it was pretty quick and called for things I'd have in the cabinet already. All of that was true. What I didn't remember was how fast they baked. My recipe said 10-12 minutes, but the cookies on the lower rack during the first batch were burned black on the bottom after just 10 minutes. I did just 7 minutes for the rest of the batches and had much better success. When they start to look light brown and puffy, wait just one more minute until they just barely start to flatten out. Then take them out. They will be soft still, but transfer them to a wire rack and they'll firm up around the edges almost immediately. The centers, though, will still be chewy.
Ginger Snaps: Just out of the oven
These cookies are splendid to make. They infuse the whole house with the smell of Christmas: ginger, cinnamon, brown sugar, cloves... And when they come out of the oven they are the perfect texture. Not crunchy like Sweetzel's Spiced Wafers (an autumn favorite of mine) but just a bit crisp around the edges and still warm and soft in the middle.
I made this easy recipe extra easy for myself, knowing I'd come home from work and have to whip these babies up and get them over to Kelly's where Small Group was being hosted. So this morning I measured out all the dry ingredients and left them in a mixing bowl on the counter. When I got home, I just had to blend the brown sugar, vegetable oil, eggs, and molasses, then mix in the flour, baking soda, and spices. The double batch made probably six dozen cookies or so. Smallish ones, about the size of a Spiced Wafer. For normal purposes, a single batch is probably enough, but if you want enough to give your mom (or serve your guests) plus some for the next few mornings at breakfast, I recommend the double batch. They really are divine.

Your Turn:
Preheat oven to 375. 
Beat in electric mixer
  • 1 C brown sugar, packed (light or dark, or a mixture)
  • 3/4 C vegetable oil
  • 1/4 C molassas
  • 1 egg
Then add
  • 2 C flour
  • 2 tsp baking soda
  • 1/4 tsp salt
  • 1/2 tsp ground cloves
  • slightly less than 1 tsp ginger (add more if you like ginger; I prefer the cinnamon to take center stage, so I go light on the ginger)
  • almost 2 tsp cinnamon (add less if you prefer a more gingery cookie)
and beat until smooth. Dough will be very soft and greasy-looking. Using two spoons, drop small blops of dough on cookie sheet. About the size of a silver dollar is good. Leave about two inches between cookies. Sprinkle the top of each cookie with white sugar. Bake at 375 for about 7-8 minutes (depending on your oven, it might need the full 10-12) just until the cookies puff up and then just barely start to flatten.
Transfer immediately to wire racks and let cool.

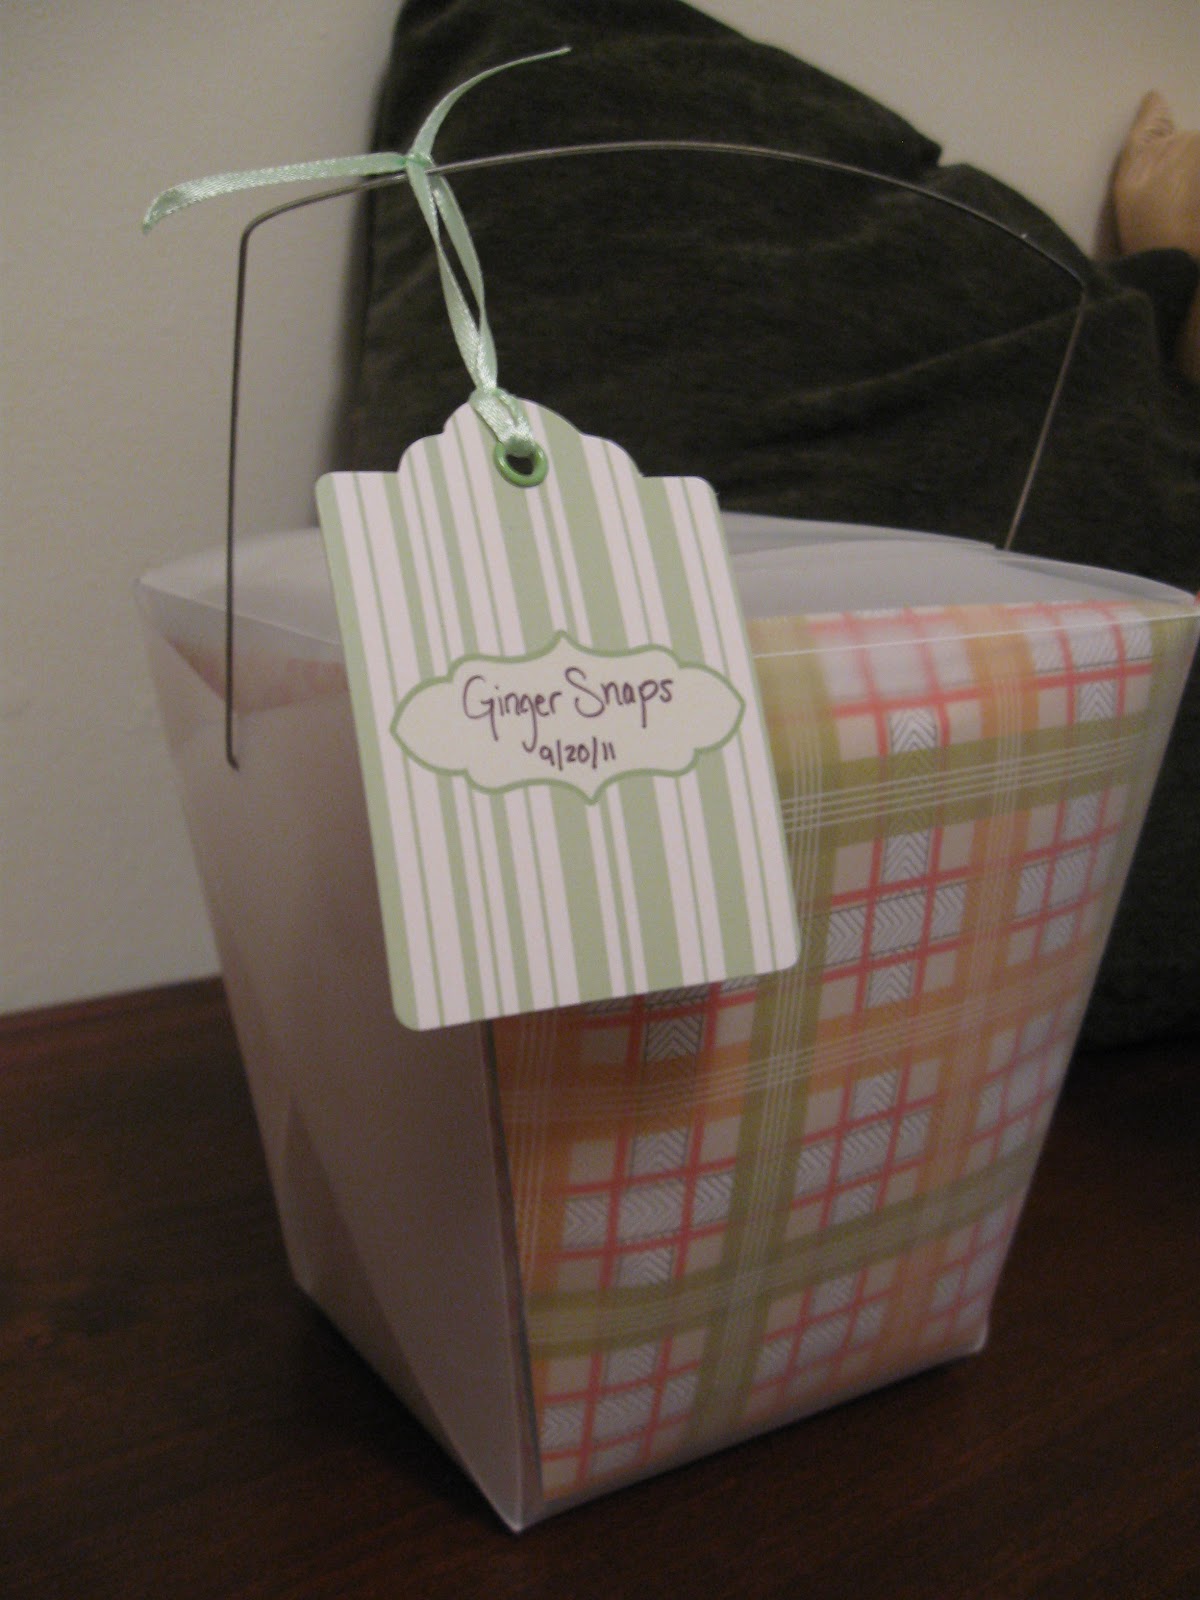
PS: If you're making these as a gift, I found a great way to package them. Buy a large "take-out box" at your local craft store and line the inside with scrapbook paper. (Just trace the outside of the box onto the back of the paper.) Then line again with waxed paper, and fill up with cookies! A cute tag identifies the contents. Yum-yum and pretty too!

Happy Birthday, Mom!

Monday, September 19, 2011

Quesadillas

The Date: 31 August 2011

The Occasion: I had a little leftover cooked ground turkey and a little leftover cooked shredded chicken from two other recent dishes. I thought quesadillas might be a fun way to use up the meat.

The Recipe: SimplyRecipes.com

How it went:
The recipe looked easy enough. Heat a tortilla in the skillet. Sprinkle with cheese, meat, and veggies. Steam 'til it melts. Fold in half. Eat. And it really was just that easy. It was easy, though, because I had the meat already cooked, just waiting to be used. It would be a pain to have to cook that first. We loved these. Next time, I'd definitely make it for guests. Quesadillas are fun and this was so simple and low-stress that it would be a perfect party meal. I made way too many this time, but they actually did really well as leftovers. I wrapped each one in aluminum foil and refrigerated them. The next day, I took one to work, unwrapped it, put it on a plate, covered it with a paper towel, and stuck it in the microwave and it was delicious. Don't forget a little container of sour cream!

Your turn:
Heat frying pan (I used 10-inch because I was using the smaller sized tortillas). Melt a little butter (slice off about half a centimeter from the stick) in the bottom of the pan.
Place a tortilla in the pan and flip every 10 seconds until it starts to bubble with air pockets.
Sprinkle with shredded Mexican cheese and any of the following:
  • chopped bell peppers
  • quartered olives
  • black beans
  • slivered red or yellow onions
  • corn (steam frozen corn for a few minutes)
  • tomatoes or salsa
  • mushrooms
  • fresh cilantro
  • shredded chicken
  • ground beef or turkey
Reduce heat and cover until the cheese melts (1-2 minutes).
Flip one side over on the other, forming a half circle.
If browned sufficiently (if not, wait until it is, then), remove from heat and transfer to cookie sheet in cool (250ish) oven to keep warm until all quesadillas are done and ready to serve.
Cut into wedges and serve with sour cream.